Cheesy Taco Sticks are a delightful addition to any snack table. These mouthwatering sticks bring the beloved flavors of a taco into a fun and easy-to-eat format that’s perfect for any occasion. Whether you’re hosting game night, looking for a quick meal, or preparing a delicious treat for the family, this recipe is sure to impress. Each bite melds gooey cheese, spicy taco seasoning, and savory fillings, creating an indulgent experience. You won’t just be serving food; you’ll be offering a taste adventure that everyone will rave about!
If you’ve ever craved tacos but wanted something different, then Cheesy Taco Sticks are the answer. They are ideal for gatherings, parties, and even a quick lunch. It’s all about satisfaction; these cheesy delights never fail to bring smiles and a satisfying crunch to your palate. This guide will walk you through everything you need to know about making these incredible snacks. From preparation techniques to serving tips, you’ll be well-equipped to impress your guests or throw together a family favorite in no time.
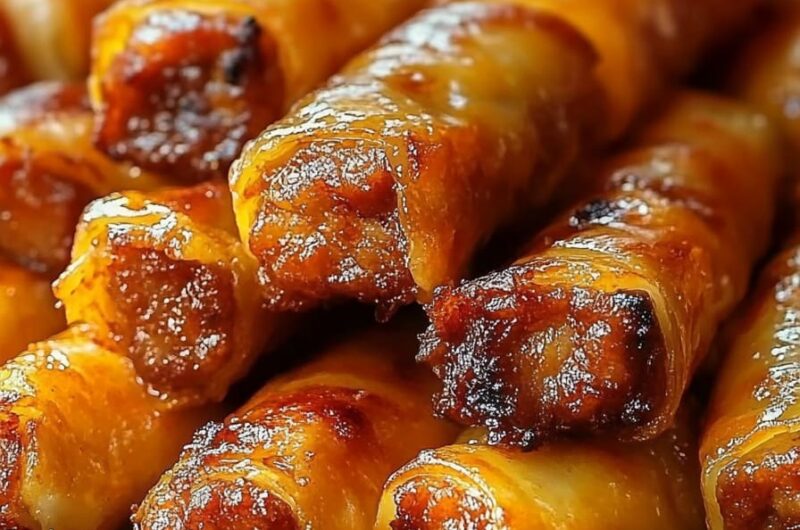
With their perfect balance of flavors and textures, Cheesy Taco Sticks will become a staple in your recipe repertoire. Imagine golden, crisp outer layers enveloping a cheesy, spicy filling that explodes with flavor in every bite. Let’s dive into what makes these sticks so appealing and how to whip them up in your kitchen!
Why You’ll Love This Recipe
Cheesy Taco Sticks stand out for various reasons that will definitely win over your heart and taste buds. Here are some compelling points:
1. Flavor Explosion: The combination of cheese and taco seasoning creates a rich, delightful flavor.
2. Kid-Friendly: Children adore finger foods, and these cheesy sticks are no exception. Great for picky eaters!
3. Easy to Make: This recipe comes together with minimal effort, making it perfect for any cook.
4. Perfect for Any Occasion: Whether it’s a snack, appetizer, or a quick meal, these sticks fit the bill.
5. Customizable: Feel free to modify the filling to your liking by adding beans, guacamole, or veggies.
6. Great for Meal Prep: These sticks freeze well, allowing you to make them ahead of time for convenience.
Each of these reasons contributes to why Cheesy Taco Sticks are a hit. They are not only delicious but also versatile and adaptable to various tastes. You’ll find that everyone loves to join in on making and munching these tasty treats!
Preparation and Cooking Time
Creating Cheesy Taco Sticks is quick and straightforward. Here’s how long you should plan for:
– Preparation Time: 20 minutes
– Cooking Time: 15-20 minutes
– Total Time: Approximately 40 minutes
These times can vary depending on your speed in the kitchen, but generally, you can expect a fun cooking session that doesn’t take too long!
Ingredients
– 1 lb ground beef (or turkey)
– 1 packet taco seasoning
– 1 cup shredded cheddar cheese
– 1 cup shredded mozzarella cheese
– ½ cup diced bell peppers (optional)
– 1 package of flour tortillas
– 1 egg (for egg wash)
– Cooking spray or oil for greasing
– Salsa (for serving, optional)
– Sour cream (for serving, optional)
Step-by-Step Instructions
Making Cheesy Taco Sticks is a breeze if you follow these steps:
1. Preheat Oven: Preheat your oven to 400°F (200°C). Line a baking sheet with parchment paper or grease it lightly with cooking spray.
2. Cook the Meat: In a skillet over medium heat, cook the ground beef until browned. Drain any excess fat.
3. Add Taco Seasoning: Stir in the taco seasoning and follow the package instructions, usually adding some water. Cook for about 5 minutes until the beef is well coated with the seasoning.
4. Mix in Cheese: Remove the skillet from heat. Add both the cheddar and mozzarella cheese to the meat mixture, stirring until the cheese melts slightly.
5. Prepare Tortillas: Lay out a tortilla on a flat surface. Place a generous amount of the meat and cheese mix in the center.
6. Fold the Tortilla: Fold the bottom of the tortilla over the filling, then fold the sides in, rolling it tightly like a burrito.
7. Prepare Egg Wash: In a small bowl, whisk the egg until fully combined. Brush the egg wash over the top of each rolled tortilla.
8. Place on Baking Sheet: Position the rolled tortillas seam side down on the prepared baking sheet.
9. Bake: Bake in the preheated oven for about 15-20 minutes, or until golden brown and crispy.
10. Cool and Slice: Remove from the oven and let them cool briefly. Slice into sticks and serve warm.
By following these steps, you’ll create scrumptious Cheesy Taco Sticks that are sure to delight!
How to Serve
Serving Cheesy Taco Sticks can enhance the overall experience. Here are some tips:
1. Presentation: Arrange the sticks on a platter, and consider garnishing with fresh cilantro for a pop of color.
2. Dipping Sauces: Serve with a variety of dips like salsa, guacamole, or sour cream to allow guests to choose their favorite flavors.
3. Pair with Drinks: These sticks pair exceptionally well with soft drinks, lemonade, or even a cold beer for the adults.
4. Add Sides: Consider serving your Cheesy Taco Sticks with a side of fresh salad or corn to balance the dish.
5. Creative Touch: For an added twist, sprinkle some lime juice over the sticks before serving for a refreshing zing.
With these serving ideas, your Cheesy Taco Sticks will surely shine on any table, making for an enjoyable mealtime experience!
Additional Tips
– Use Fresh Ingredients: Fresh produce and quality cheese will elevate the flavor of your Cheesy Taco Sticks. Don’t skimp on the freshness!
– Spice Level: Adjust the level of spice by choosing mild or spicy taco seasoning according to your preference.
– Make a Dipping Sauce: Enhance the experience by whipping up a simple dipping sauce with sour cream, lime juice, and a hint of garlic powder.
Recipe Variation
Feel free to explore different variations of Cheesy Taco Sticks! Here are some ideas:
1. Vegetarian Option: Substitute ground beef with black beans or lentils. Add corn and diced zucchini for extra flavor and texture.
2. Cheesy Jalapeño Taco Sticks: Add diced jalapeños to the cheese and meat mixture for a fiery kick.
3. Tex-Mex Twist: Incorporate some diced avocado or guacamole into the filling for a creamy flavor boost.
Freezing and Storage
– Storage: Store leftover Cheesy Taco Sticks in an airtight container in the refrigerator. They can last up to 3-5 days.
– Freezing: For longer storage, freeze them in a single layer on a baking sheet. Once frozen, transfer them to a freezer bag, and they will keep for up to 2 months. To reheat, bake from frozen at 375°F (190°C) for 20-25 minutes.
Special Equipment
Preparing Cheesy Taco Sticks requires a few essential kitchen tools:
– Skillet: For browning the meat and mixing it with the cheese.
– Baking Sheet: To place the rolled sticks in the oven for baking.
– Parchment Paper (optional): To line your baking sheet and prevent sticking.
– Baking Brush: For applying the egg wash on the tortillas.
Frequently Asked Questions
Can I use shredded cheese instead of block cheese?
Yes, pre-shredded cheese works perfectly well and melts nicely.
How can I make them gluten-free?
Use corn tortillas instead of flour tortillas to ensure the recipe is gluten-free.
Can I prepare the filling in advance?
Absolutely! You can prepare the meat and cheese mixture ahead of time and store it in the refrigerator, allowing for quick assembly later.
What other fillings can I use?
Feel free to get creative! You can use chicken, turkey, or even a blend of cheeses and beans to customize your Cheesy Taco Sticks.
What should I serve with the Cheesy Taco Sticks?
These taco sticks pair wonderfully with various dips, fresh salads, or even a side of corn for a complete meal.
Conclusion
Cheesy Taco Sticks are more than just a snack; they are a delicious fusion of flavor and fun! Whether you’re attending a barbecue, hosting a game night, or simply wanting to enjoy a cheesy treat, these taco sticks are sure to please. With their versatility, easy preparation, and delightful taste, they’ll quickly become a favorite among family and friends. Get ready to enjoy every cheesy, crunchy bite!
Cheesy Taco Sticks: An Amazing Ultimate Recipe

- Prep Time: 15 minutes
- Cook Time: 20 minutes
- Total Time: 35 minutes
Ingredients
– 1 lb ground beef (or turkey)
– 1 packet taco seasoning
– 1 cup shredded cheddar cheese
– 1 cup shredded mozzarella cheese
– ½ cup diced bell peppers (optional)
– 1 package of flour tortillas
– 1 egg (for egg wash)
– Cooking spray or oil for greasing
– Salsa (for serving, optional)
– Sour cream (for serving, optional)
Instructions
Making Cheesy Taco Sticks is a breeze if you follow these steps:
1. Preheat Oven: Preheat your oven to 400°F (200°C). Line a baking sheet with parchment paper or grease it lightly with cooking spray.
2. Cook the Meat: In a skillet over medium heat, cook the ground beef until browned. Drain any excess fat.
3. Add Taco Seasoning: Stir in the taco seasoning and follow the package instructions, usually adding some water. Cook for about 5 minutes until the beef is well coated with the seasoning.
4. Mix in Cheese: Remove the skillet from heat. Add both the cheddar and mozzarella cheese to the meat mixture, stirring until the cheese melts slightly.
5. Prepare Tortillas: Lay out a tortilla on a flat surface. Place a generous amount of the meat and cheese mix in the center.
6. Fold the Tortilla: Fold the bottom of the tortilla over the filling, then fold the sides in, rolling it tightly like a burrito.
7. Prepare Egg Wash: In a small bowl, whisk the egg until fully combined. Brush the egg wash over the top of each rolled tortilla.
8. Place on Baking Sheet: Position the rolled tortillas seam side down on the prepared baking sheet.
9. Bake: Bake in the preheated oven for about 15-20 minutes, or until golden brown and crispy.
10. Cool and Slice: Remove from the oven and let them cool briefly. Slice into sticks and serve warm.
By following these steps, you’ll create scrumptious Cheesy Taco Sticks that are sure to delight!
Nutrition
- Serving Size: 4
- Calories: 350 kcal
- Fat: 15g
- Protein: 20g