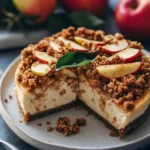
Apple Crisp Cheesecake: An Amazing Ultimate Recipe
- Prep Time: 25 minutes
- Cook Time: 60 minutes
- Total Time: 1 hour 25 minutes
Ingredients
– For the Cheesecake:
– 2 cups cream cheese, softened
– 1 cup granulated sugar
– 1 teaspoon vanilla extract
– 3 large eggs
– 1 cup sour cream
– 1 tablespoon all-purpose flour
– For the Apple Filling:
– 3 medium apples, peeled and diced
– 1 teaspoon cinnamon
– ½ teaspoon nutmeg
– ½ cup brown sugar
– 1 tablespoon lemon juice
– For the Crisp Topping:
– 1 cup old-fashioned oats
– 1 cup all-purpose flour
– 1 cup brown sugar
– ½ cup unsalted butter, melted
– 1 teaspoon cinnamon
Instructions
Creating your Apple Crisp Cheesecake is an enjoyable process. Follow these steps to achieve a stunning dessert:
1. Preheat Oven: Begin by preheating your oven to 325°F (160°C). Grease a 9-inch springform pan with cooking spray or butter.
2. Prepare Apple Filling: In a medium bowl, mix the diced apples with lemon juice, cinnamon, nutmeg, and brown sugar. Toss until well combined, then set aside to macerate.
3. Make Cheesecake Batter: In a large mixing bowl, beat the softened cream cheese until smooth. Gradually add sugar and vanilla, mixing until well incorporated.
4. Add Eggs and Flour: Add eggs one at a time, beating on low speed. Add sour cream and flour, mixing until just combined. Avoid over-mixing.
5. Layer Cheesecake and Apples: Pour half of the cheesecake batter into the prepared springform pan. Spoon half of the apple mixture over the batter. Pour the remaining cheesecake batter over the apples, followed by the remaining apple mixture.
6. Prepare Crisp Topping: In a separate bowl, combine oats, flour, brown sugar, melted butter, and cinnamon. Mix until crumbly. Sprinkle this over the apple mixture.
7. Bake: Bake in the preheated oven for 55-60 minutes, or until the cheesecake is set around the edges and slightly jiggly in the center.
8. Cool and Chill: Remove from the oven and let it cool for 1 hour. Once cooled, refrigerate for at least 4 hours or overnight for optimal texture.
9. Release from Pan: When ready to serve, gently release the springform pan. You can use a knife to run around the edges if necessary.
Nutrition
- Serving Size: 12 servings
- Calories: 350 kcal
- Fat: 15g
- Protein: 6g
