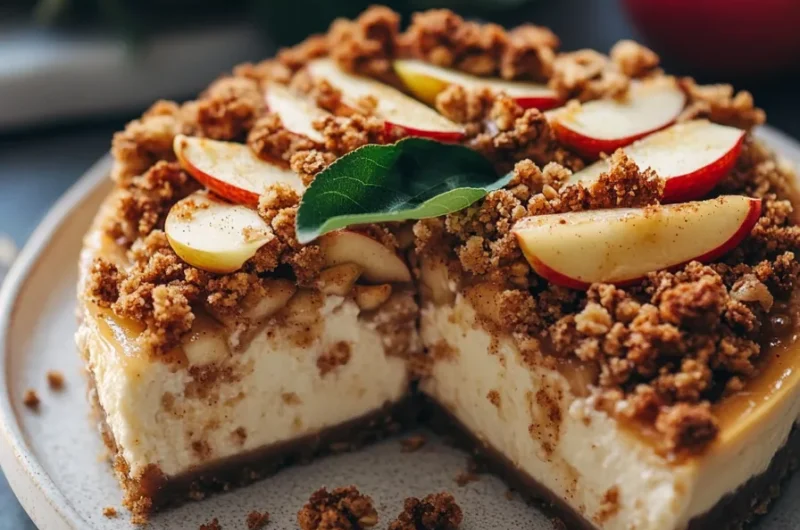
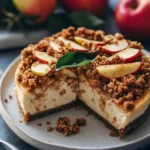
Apple Crisp Cheesecake is a delightful fusion of two beloved desserts: rich cheesecake and warm apple crisp. This dish marries creamy texture with crispy topping, creating an incredible treat that bursts with flavor in every bite. It’s a dessert that not only dazzles the palate but also warms the heart, making it perfect for family gatherings, holiday celebrations, or a cozy night in. Each slice of this wonderful cheesecake is a sweet reminder of cherished autumn flavors, making it even more inviting as the leaves begin to change colors.
If you are a fan of cheesecake, you’ll be thrilled with this recipe. The Apple Crisp Cheesecake combines classic cheesecake creaminess with the delightful crunch and spice of an apple crisp. The cream cheese filling is luscious and tangy, perfectly complemented by the sweetness of caramelized apples and the buttery, crumbly topping. Picture yourself enjoying a piece, topped with a scoop of vanilla ice cream as it melts into the warm cheesecake—a truly amazing experience!
In this article, you will discover why this Apple Crisp Cheesecake recipe is a must-try, along with an easy-to-follow guide for preparation. Whether you’re an experienced baker or a novice in the kitchen, this recipe promises to inspire you to whip up a delectable dessert that will impress everyone lucky enough to share it. Let’s explore everything from the ingredients you’ll need to the best way to serve this incredible treat!
Why You’ll Love This Recipe
What makes this Apple Crisp Cheesecake so special? Here are several reasons why you’ll fall head over heels for this recipe:
1. Unique Flavor Combination – The marriage of creamy cheesecake and spiced apples creates an unforgettable taste experience.
2. Perfect for Any Occasion – This cheesecake is ideal for holidays, potlucks, or simply satisfying your sweet tooth.
3. Visually Appealing – A golden crisp topping adds a stunning visual appeal, making your dessert the centerpiece of any table.
4. Easy to Make – With straightforward instructions, you’ll feel confident making this dessert, even if you’re not a pro in the kitchen.
5. Comforting and Satisfying – Each bite evokes feelings of warmth and nostalgia, perfect for fall or winter.
6. Leftovers Are Fantastic – Any leftovers will only get better as flavors meld, making it a delightful treat for days to come.
With these enticing qualities, it’s clear why the Apple Crisp Cheesecake is destined to become a classic in your dessert repertoire. Each layer, from the creamy filling to the crunchy topping, is crafted to create a memorable culinary delight!
Preparation and Cooking Time
To make Apple Crisp Cheesecake, you will want to ensure you allocate enough time for preparation and baking. Here’s a detailed breakdown of what to expect:
– Preparation Time: 25 minutes
– Cooking Time: 60 minutes
– Cooling Time: 1 hour
– Chilling Time: 4 hours (or overnight for best results)
In total, you should plan for around 5 hours and 25 minutes from start to finish. This includes cooling and chilling, which are crucial for the best flavor development.
Ingredients
– For the Cheesecake:
– 2 cups cream cheese, softened
– 1 cup granulated sugar
– 1 teaspoon vanilla extract
– 3 large eggs
– 1 cup sour cream
– 1 tablespoon all-purpose flour
– For the Apple Filling:
– 3 medium apples, peeled and diced
– 1 teaspoon cinnamon
– ½ teaspoon nutmeg
– ½ cup brown sugar
– 1 tablespoon lemon juice
– For the Crisp Topping:
– 1 cup old-fashioned oats
– 1 cup all-purpose flour
– 1 cup brown sugar
– ½ cup unsalted butter, melted
– 1 teaspoon cinnamon
Step-by-Step Instructions
Creating your Apple Crisp Cheesecake is an enjoyable process. Follow these steps to achieve a stunning dessert:
1. Preheat Oven: Begin by preheating your oven to 325°F (160°C). Grease a 9-inch springform pan with cooking spray or butter.
2. Prepare Apple Filling: In a medium bowl, mix the diced apples with lemon juice, cinnamon, nutmeg, and brown sugar. Toss until well combined, then set aside to macerate.
3. Make Cheesecake Batter: In a large mixing bowl, beat the softened cream cheese until smooth. Gradually add sugar and vanilla, mixing until well incorporated.
4. Add Eggs and Flour: Add eggs one at a time, beating on low speed. Add sour cream and flour, mixing until just combined. Avoid over-mixing.
5. Layer Cheesecake and Apples: Pour half of the cheesecake batter into the prepared springform pan. Spoon half of the apple mixture over the batter. Pour the remaining cheesecake batter over the apples, followed by the remaining apple mixture.
6. Prepare Crisp Topping: In a separate bowl, combine oats, flour, brown sugar, melted butter, and cinnamon. Mix until crumbly. Sprinkle this over the apple mixture.
7. Bake: Bake in the preheated oven for 55-60 minutes, or until the cheesecake is set around the edges and slightly jiggly in the center.
8. Cool and Chill: Remove from the oven and let it cool for 1 hour. Once cooled, refrigerate for at least 4 hours or overnight for optimal texture.
9. Release from Pan: When ready to serve, gently release the springform pan. You can use a knife to run around the edges if necessary.
How to Serve
When serving your Apple Crisp Cheesecake, make sure to follow these tips for an impressive presentation:
1. Presentation: Place the cheesecake on a decorative cake stand or serving platter to elevate its look.
2. Add Toppings: Consider drizzling caramel sauce or serving with whipped cream on top to enhance its richness. A sprinkle of cinnamon can add a nice touch.
3. Slice Size: Use a sharp knife to cut clean slices. Offer generous portions, but encourage guests to take smaller pieces to savor the flavors fully.
4. Pairing: This cheesecake pairs beautifully with coffee, cider, or a glass of dessert wine, making the experience even more special.
By thoughtfully presenting and serving your Apple Crisp Cheesecake, you’ll create memorable moments that delight both you and your guests!
Additional Tips
– Choose the Right Apples: For the best flavor in your Apple Crisp Cheesecake, opt for a mix of tart and sweet apples, like Granny Smith and Honeycrisp.
– Allow Time to Chill: Chilling the cheesecake overnight will enhance the flavors and give it a firmer texture, making it easier to cut.
– Serve with a Topping: Enhance the dessert by adding caramel sauce, a dusting of powdered sugar, or cinnamon atop each slice before serving.
– Experiment with Spices: Feel free to add a pinch of allspice or ginger to the apple filling for an extra kick of flavor.
Recipe Variation
Explore some creative variations of the Apple Crisp Cheesecake to suit your taste:
1. Caramel Apple Crisp Cheesecake: Drizzle caramel sauce in between the layers of apples for an added layer of sweetness.
2. Nutty Topping: Mix crushed walnuts or pecans into the crisp topping for a richer flavor and delightful crunch.
3. Pumpkin Spice Cheesecake: Replace some of the sour cream with pumpkin puree and incorporate pumpkin spice in the cheesecake batter for a seasonal twist.
4. Cheesecake Bars: Transform the cheesecake into bars by baking it in a lined 9×13 inch pan, cutting into squares, and serving as handheld treats.
Freezing and Storage
– Refrigeration: Store leftovers in the refrigerator, covered, for up to 5 days. This helps keep the flavors fresh.
– Freezing: To freeze, wrap individual slices in plastic wrap and then in aluminum foil. They can be stored in the freezer for up to 3 months. Thaw in the refrigerator overnight before enjoying.
Special Equipment
Before you start making your Apple Crisp Cheesecake, gather a few essential tools:
– 9-inch springform pan: This allows for easy removal and beautiful presentation of your cheesecake.
– Mixing bowls: Useful for mixing the filling and the apple topping.
– Electric mixer: Ensures a smooth and creamy cheesecake batter.
– Measuring cups and spoons: For accurately measuring out your ingredients.
– A sharp knife: Ideal for slicing the cheesecake cleanly for serving.
Frequently Asked Questions
Can I make this cheesecake in advance?
Yes, this cheesecake is perfect for making a day or two ahead of time, letting the flavors meld beautifully while chilling in the fridge.
What type of apples work best for this cheesecake?
A combination of tart apples like Granny Smith and sweet varieties like Fuji or Honeycrisp works wonderfully for a balanced flavor.
How can I tell if the cheesecake is done baking?
The edges should be set, while the center of the cheesecake can still have a slight jiggle. Avoid overbaking to maintain a creamy texture.
Can this recipe be adapted for gluten-free diets?
Certainly! Simply substitute the all-purpose flour in the crust and crisp topping with a gluten-free flour blend.
What should I do if my cheesecake cracks while baking?
Cracking can occur due to excessive heat or overbaking. To prevent this, avoid opening the oven door frequently and consider using a water bath during baking.
Conclusion
The Apple Crisp Cheesecake is a sumptuous union of flavors that will surely delight your taste buds. With its velvety cheesecake, spiced apple filling, and a crunchy topping, this dessert is a perfect choice for any occasion. Whether you’re indulging alone or sharing with loved ones, each slice is bound to bring smiles and satisfaction. Don’t hesitate to try this recipe; it may soon become a cherished favorite in your household!
Apple Crisp Cheesecake: An Amazing Ultimate Recipe
- Prep Time: 25 minutes
- Cook Time: 60 minutes
- Total Time: 1 hour 25 minutes
Ingredients
– For the Cheesecake:
– 2 cups cream cheese, softened
– 1 cup granulated sugar
– 1 teaspoon vanilla extract
– 3 large eggs
– 1 cup sour cream
– 1 tablespoon all-purpose flour
– For the Apple Filling:
– 3 medium apples, peeled and diced
– 1 teaspoon cinnamon
– ½ teaspoon nutmeg
– ½ cup brown sugar
– 1 tablespoon lemon juice
– For the Crisp Topping:
– 1 cup old-fashioned oats
– 1 cup all-purpose flour
– 1 cup brown sugar
– ½ cup unsalted butter, melted
– 1 teaspoon cinnamon
Instructions
Creating your Apple Crisp Cheesecake is an enjoyable process. Follow these steps to achieve a stunning dessert:
1. Preheat Oven: Begin by preheating your oven to 325°F (160°C). Grease a 9-inch springform pan with cooking spray or butter.
2. Prepare Apple Filling: In a medium bowl, mix the diced apples with lemon juice, cinnamon, nutmeg, and brown sugar. Toss until well combined, then set aside to macerate.
3. Make Cheesecake Batter: In a large mixing bowl, beat the softened cream cheese until smooth. Gradually add sugar and vanilla, mixing until well incorporated.
4. Add Eggs and Flour: Add eggs one at a time, beating on low speed. Add sour cream and flour, mixing until just combined. Avoid over-mixing.
5. Layer Cheesecake and Apples: Pour half of the cheesecake batter into the prepared springform pan. Spoon half of the apple mixture over the batter. Pour the remaining cheesecake batter over the apples, followed by the remaining apple mixture.
6. Prepare Crisp Topping: In a separate bowl, combine oats, flour, brown sugar, melted butter, and cinnamon. Mix until crumbly. Sprinkle this over the apple mixture.
7. Bake: Bake in the preheated oven for 55-60 minutes, or until the cheesecake is set around the edges and slightly jiggly in the center.
8. Cool and Chill: Remove from the oven and let it cool for 1 hour. Once cooled, refrigerate for at least 4 hours or overnight for optimal texture.
9. Release from Pan: When ready to serve, gently release the springform pan. You can use a knife to run around the edges if necessary.
Nutrition
- Serving Size: 12 servings
- Calories: 350 kcal
- Fat: 15g
- Protein: 6g